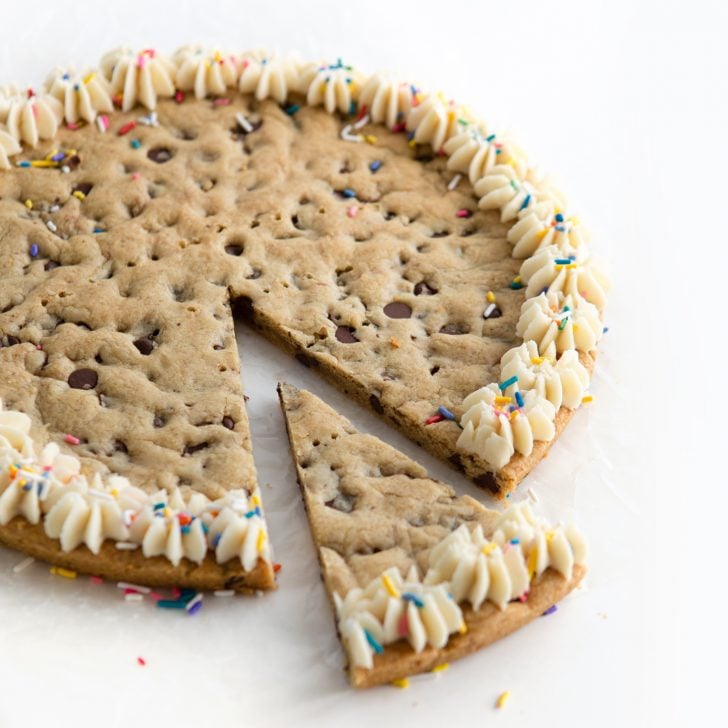
Skip the store-bought and make this easy GIANT birthday cookie cake instead! This cookie cake recipe is perfectly chewy, chocolatey, celebratory, and even comes with a FREE set of number templates to help you decorate!
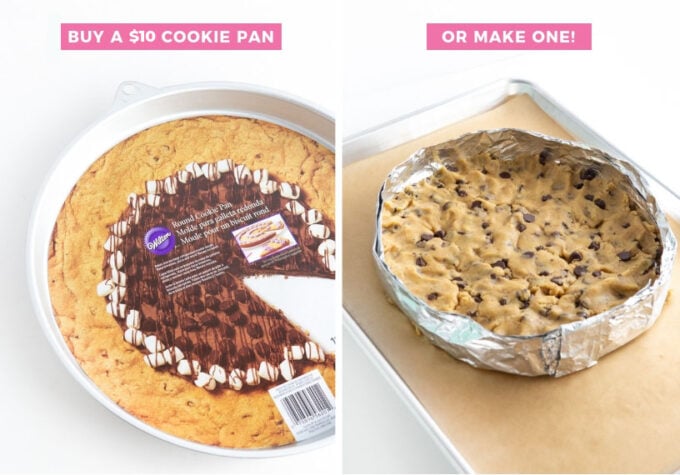
Don’t have a round cookie cake pan? Snag one on Amazon for $10, make a DIY foil cookie cake pan, or use my Chocolate Chip Cookie Bars to bake in a 9×13 pan!
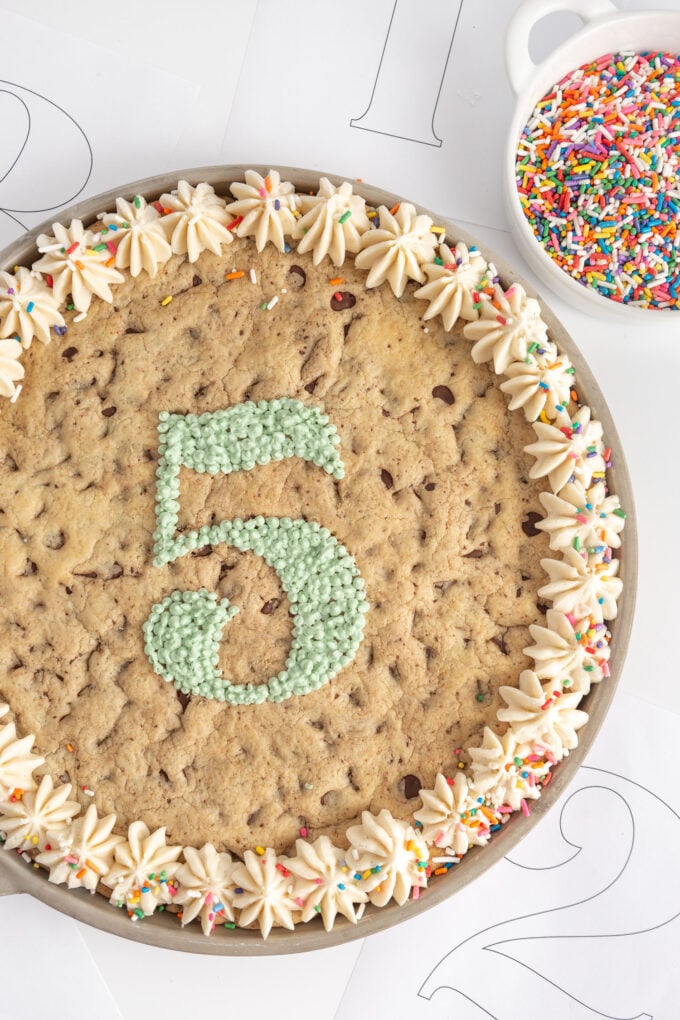
How do you make a cookie cake from scratch? I promise it’s easier than you think! Follow my step-by-step instructions below, which even include a template for piping on the cutest numbers on top!
After posting my Homemade Cookie Cake Recipe, I knew I needed to come up with an EASY way to help you decorate it for birthdays! (Because let’s be honest, piping words is hard.) So while this is the same “base” recipe, we’re doubling the frosting and using my free number template to create a simple, yet stunning cookie cake design!
Add some colorful sprinkles, buttercream frosting, and candles for a fun alternative to a traditional cake.
What You Need to Make a Giant Birthday Cookie Cake
For the giant cookie cake recipe:
- Unsalted butter
- Light brown sugar & granulated sugar
- Large Egg
- Vanilla extract
- Baking soda, baking powder, and salt
- All-purpose flour
- Semi-sweet chocolate chips
- 10.5″ Metal Round Pan or DIY foil pan (instuctions in my original Homemade Cookie Cake Recipe post).
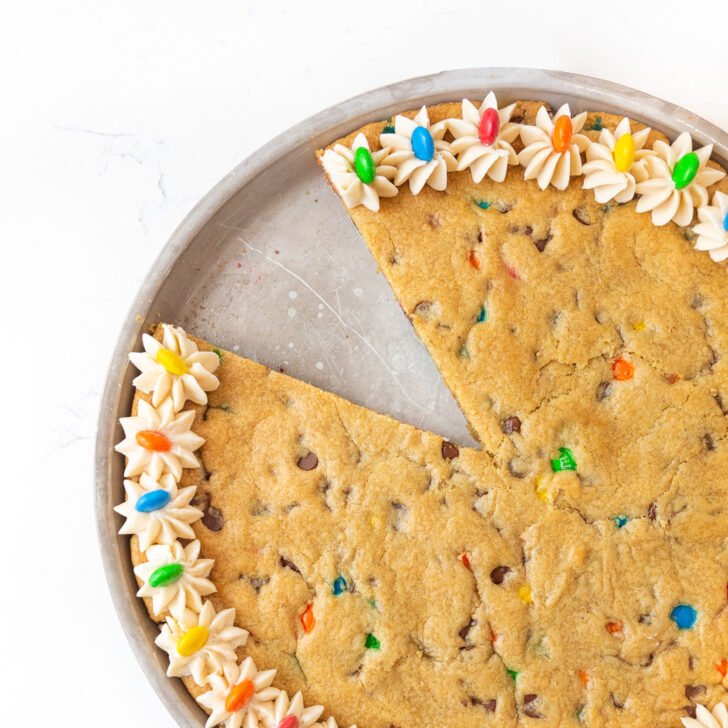
Customize it! Want to make a birthday cookie cake with M&Ms? You can do that! You can also get creative and add crushed Oreo, sprinkles, toffee bits, peanut butter chips, or any other cookie mix-ins you like. If you want to bake this in a 9×13 pan, use my Chocolate Chip Cookie Bars recipe since it’s adjusted to fill the larger pan.
For the vanilla buttercream frosting recipe:
- Unsalted butter – It’s helpful to let this come to room temperature so it whips up into a creamy, dreamy, smooth frosting. Cold butter will make the frosting harder to pipe.
- Powdered sugar – Also known as confectioners’ sugar.
- Vanilla extract
- Pinch of salt
- Milk – You can use any milk you have on hand, but if you’re buying it specifically for this recipe, I recommend getting whole milk.
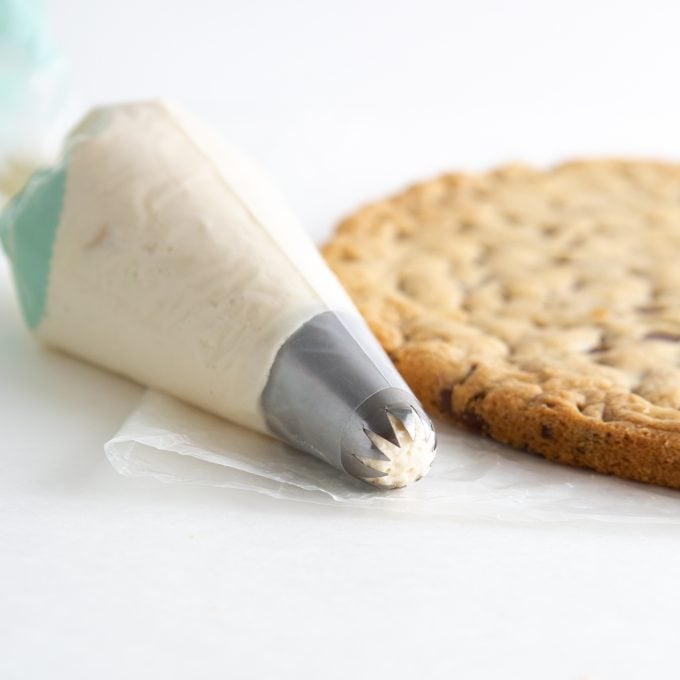
- Piping Bag & Tips (optional): Large star piping tip (for border) & #5 round piping tip (for numbers)
- Printable Number Stencils
PS. The frosting hardens juuuust enough to keep it intact so it’s not a mess when little hands are picking up the cookie pieces to eat.
How to Make This Birthday Cookie Cake Recipe:
Step 1: Crush Half of the Chocolate Chips
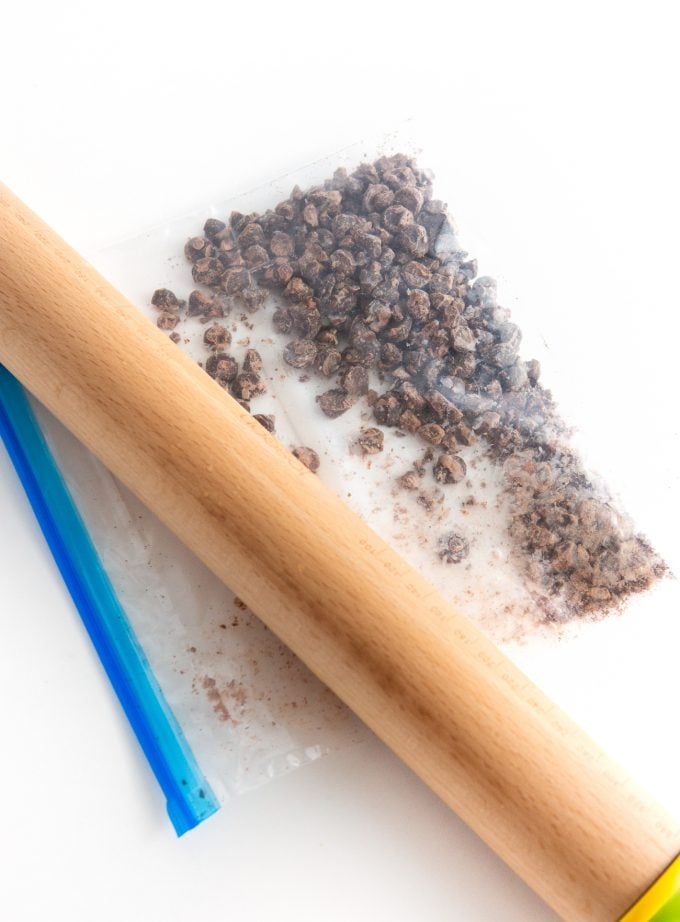
Place 1/2 cup of the chocolate chips in a zip-top plastic bag and break them up with a rolling pin. This is the secret to getting the most chocolatey chocolate chip birthday cookie cake—the small bits of chocolate deliver chocolate in every bite, while the whole chocolate chips give you that irresistible chunky chocolate chip cookie texture.
Don’t have a rolling pin? You can use a mallet or a meat tenderizer instead. Just be careful when you pick the bag up—when you pound the chocolate chips instead of rolling them, you might end up with tiny holes in the bag.
Step 2: Make the Cookie Dough
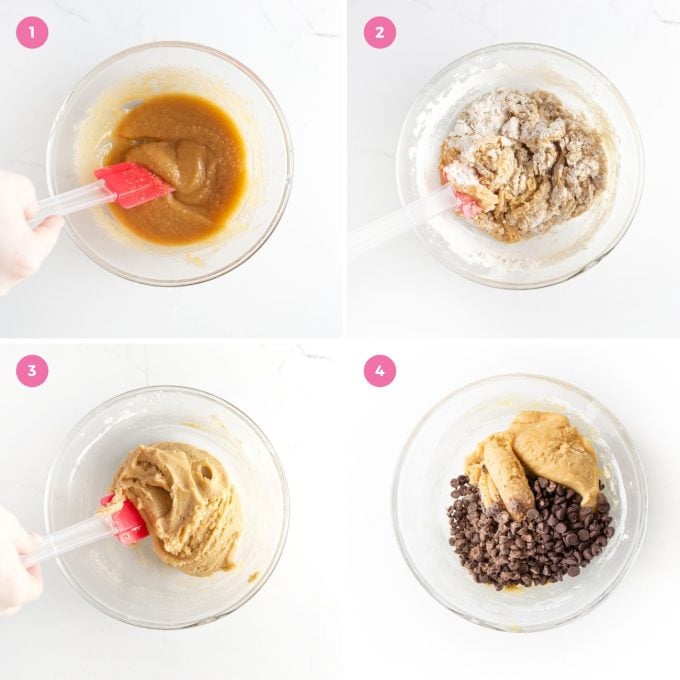
Melt the butter in a microwave-safe bowl or saucepan, then pour it into a mixing bowl. Add both sugars and use a spatula or wooden spoon to stir them together. Once they’re combined, stir in the egg followed by the baking soda, baking powder, and salt. Pour in the flour and stir until just combined, then fold in your chocolate chips—the whole ones and the smashed ones.
Tip: Don’t be tempted to get out your electric mixer for this recipe! Hand mixing is key. With cakes and muffins, we want to use a mixer to whip air into the batter for light, fluffy baked goods. But here, we’re aiming for dense and chewy.
Step 3: Press the Dough into the Pan
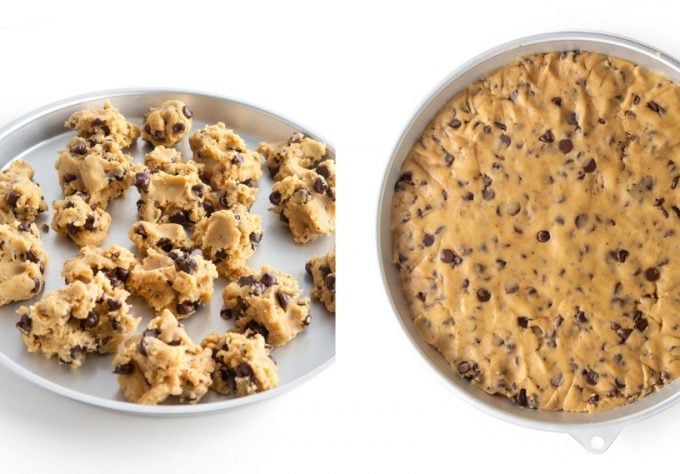
Grease your pan or line it with parchment paper. Use a spoon or clean hands to drop small pieces of dough all over the pan; this is key to getting an even cookie cake.
Use a spatula or your hands to press the dough down into a smooth layer, and make sure the chocolate chips are distributed evenly too. If you have a few stuck together, they’ll create weak spots in the cookie cake that are likely to break when cutting.
Tip: If you don’t have a 10.5-inch metal cookie cake pan, use a 9×13-inch metal pan and make a rectangular birthday cookie cake; this will result in a thinner cookie cake, so it will finish baking a bit earlier so I recommend checking it at 12 minutes (if you want it thicker, use my Chocolate Chip Cookie Bars recipe instead). You can also find the instructions for making a DIY cookie cake pan in my homemade cookie cake recipe.
Step 4: Bake
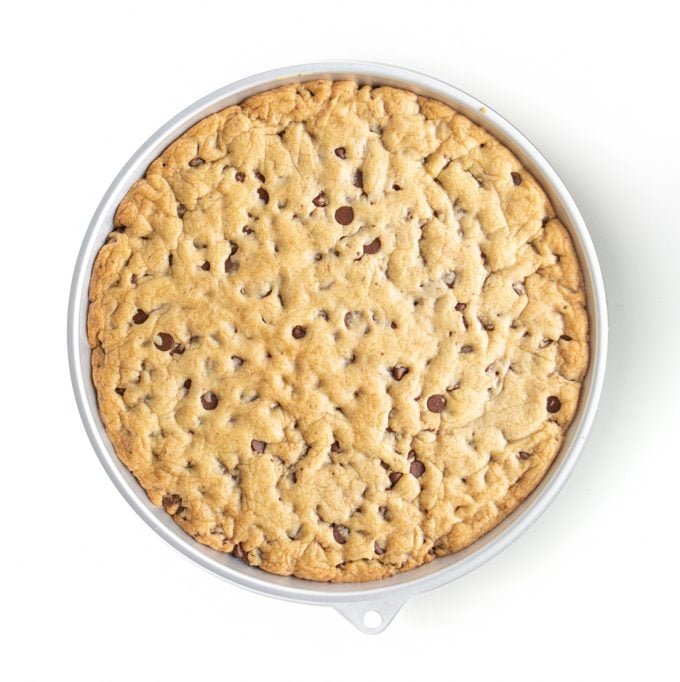
Pop your cookie cake in the oven and bake it at 350ºF for 12 to 14 minutes. The cake might not seem like it’s done at this point, but keep in mind: it will continue baking a little bit from the residual heat from the metal pan. This yields a perfectly chewy cookie, which is exactly what you want—a crunchy cookie cake will be hard to cut and will crumble!
Tip: So how do you know when your birthday cookie cake is done? As mentioned above, it will look underbaked, but the top will be golden brown and the edges will feel dry to the touch, not doughy.
Step 5: Cool
Good things come to those who wait and this is true of giant birthday cookie cakes too. The cookie cake needs to be completely cool before you remove it from the pan (if you don’t want to risk it, you can also just serve it in the pan!). You can make your buttercream while you wait for your cookie cake to cool.
Once the cookie is cool, run a butterknife all along the edges to loosen it. Place a flat platter or cutting board on top of the pan, then quickly and carefully flip it over—the cookie cake should fall out easily. Then, place your serving platter over the cookie cake and flip it again.
Tip: I use these cute paper serving platters—the largest one in the pack is perfect for a 10.5-inch cookie cake.

Step 6: Decorate
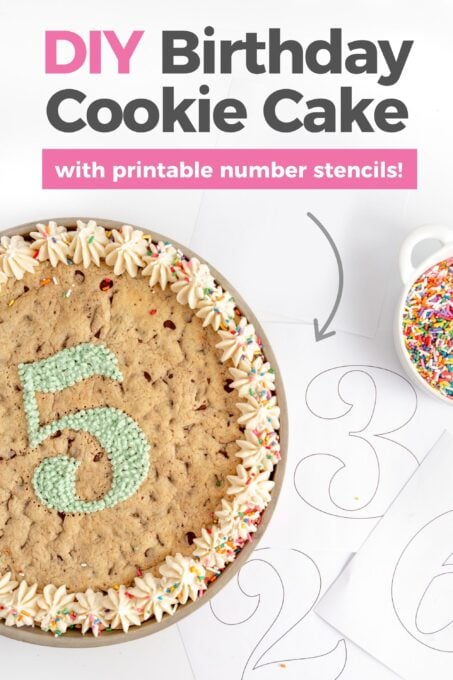
Now it’s time for the fun part—decorating! With the help of my free number template, you don’t even need to be a professional cake decorator to get a professional look with a birthday cookie cake – promise!
So how do you decorate a giant cookie cake? You can use my vanilla buttercream recipe (below) or use store-bought frosting in a can or tube.
- Print Template: If adding a number to the center, print off the page you need using my free printable number template. Use an exacto knife or scissors to cut out the center of the number.
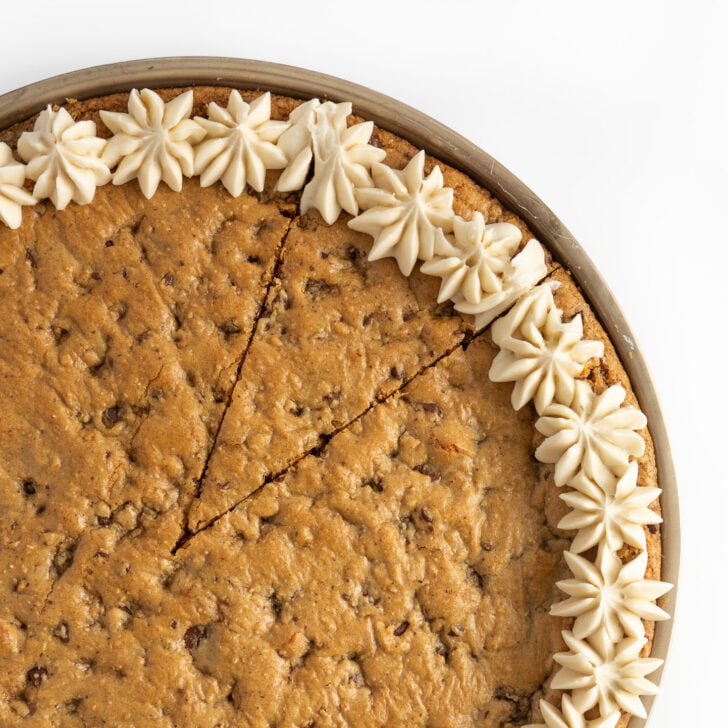
- Pipe Border: Use a large star tip to pipe uniform-sized stars all along the border. If you’re using sprinkles, scatter them over the frosting immediately after you’re finished piping so they stick.
- Pipe Number: Lay the template in the center of the cookie cake and pipe small dots along the border. Finish by piping small dots in the inside until the number is filled in.
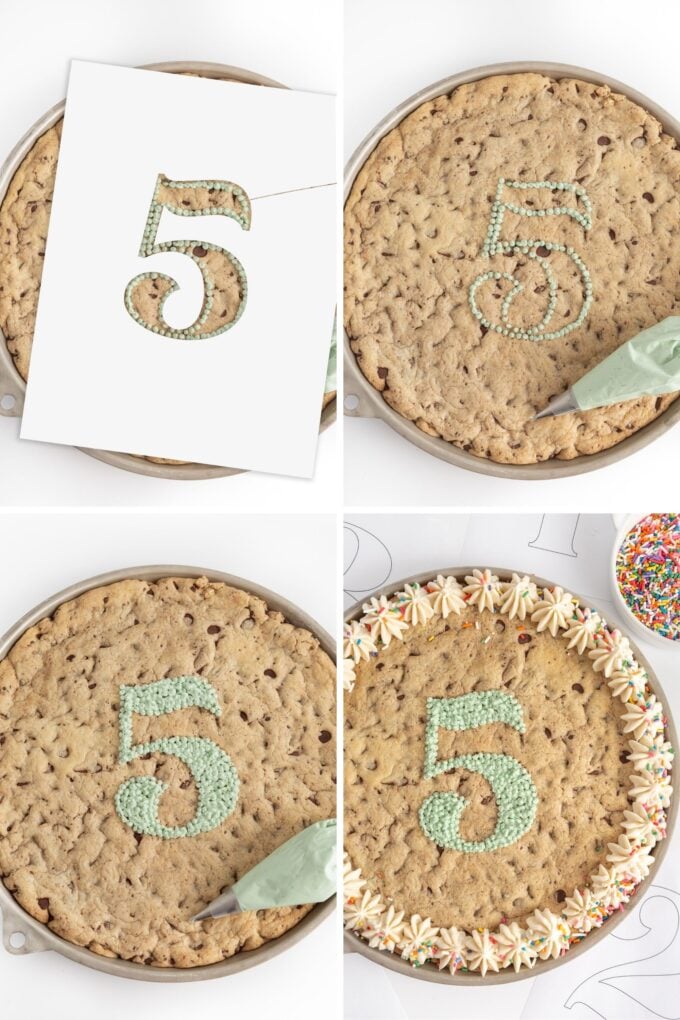
Tip #1 – Piping: If you don’t have piping bags or metal tips for the frosting, you can put it in a zip-top bag and snip off the corner (it just won’t be as decorative). For the numbers, though, I do suggest using a piping tip (I used a #5 round tip) because the snipped-bag-corner alone is a little hard to cleanly decorate with.
Tip #2 – Double Digits: If you want to add double-digits, print off the two separate pages. Pipe the outlines of each number first, then fill in (if you fill in one before you outline the other, you’ll have a greater chance of ruining the first letter). If you’re using a smaller pan than the 10.5″ round pan, double digits may be hard to fit but you can always create your own templates using your favorite fonts!
Step 7: Cut and Serve
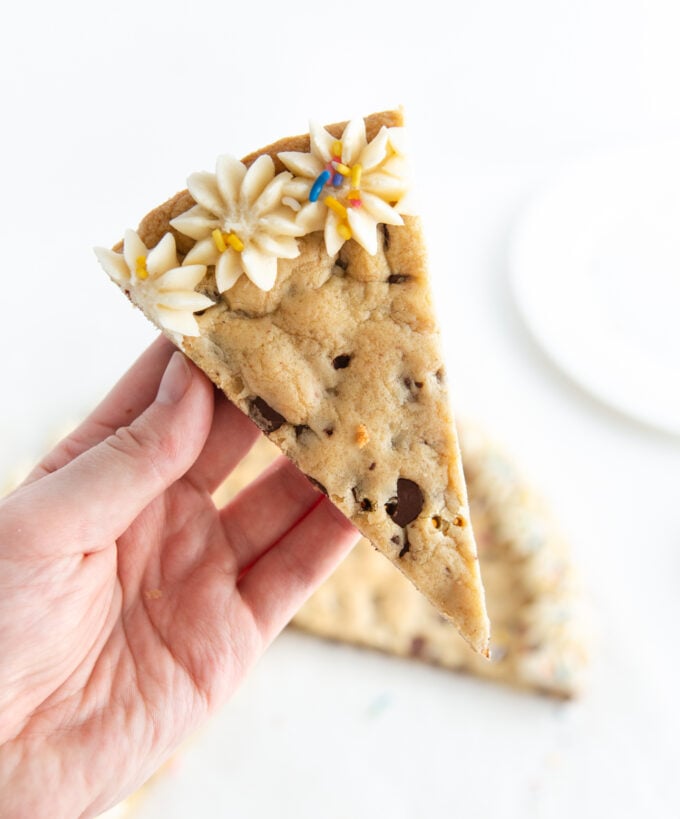
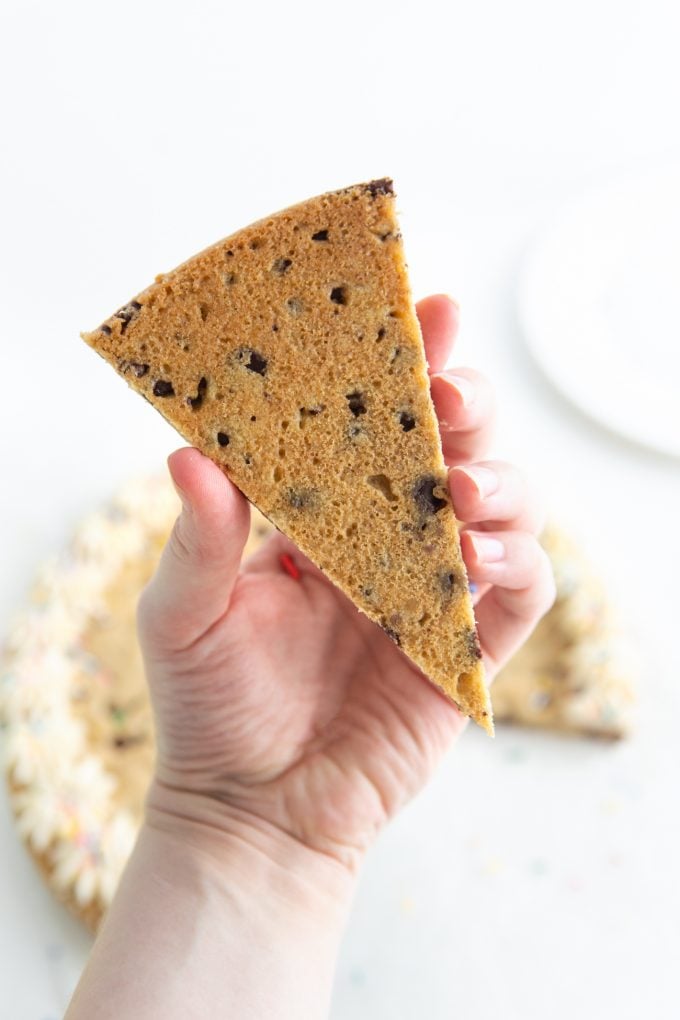
After you’ve sung Happy Birthday and the guest of honor has blown out the candles, it’s time to slice this birthday cookie cake so everyone can enjoy it! Use a sharp chef’s knife and cut it into triangle-shaped wedges or smaller squares, depending on how many people you’re serving.
Tip: Since you don’t need a fork to eat this cookie cake, you can serve it on napkins instead of plates!
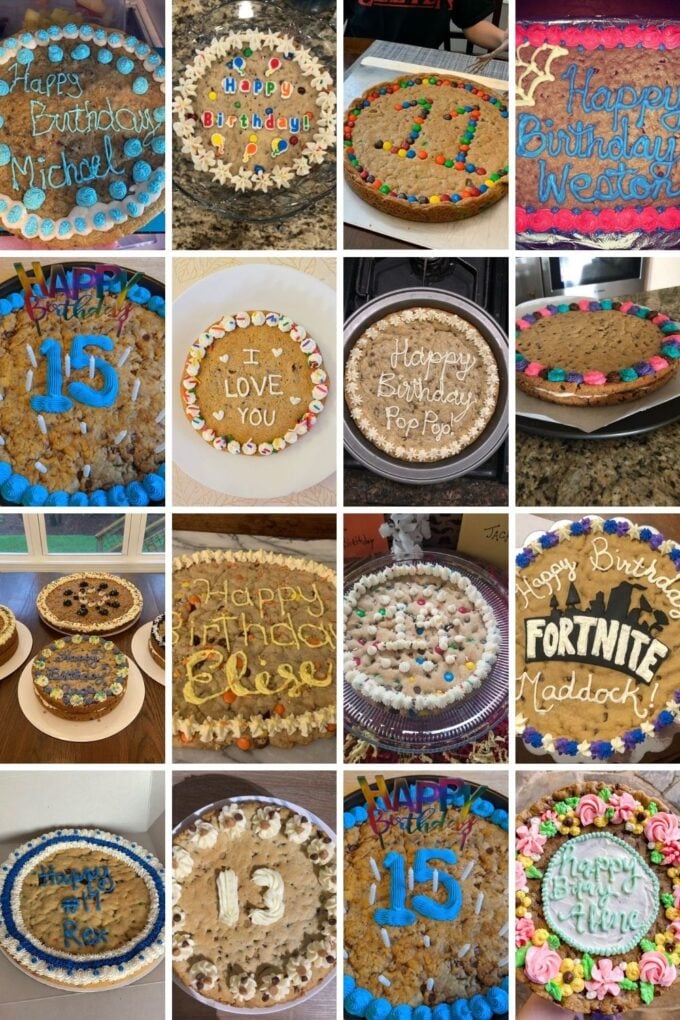
More fun birthday cookie cake decorating ideas:
Of course, you can use your own cookie cake frosting ideas based on your celebration! For more happy birthday cookie cake inspiration (shown below!), check out over 75+ reader photos on Pinterest!
- 21st birthday cookie cake – Add gold dust or edible glitter to the frosting for a glam effect. Metallic star sprinkles are super fun too!
- Kids birthday cookie cake – Use food coloring to make the buttercream different colors to coordinate with your party’s theme.
- Chocolate lovers’ birthday cookie cake – Swap out the vanilla buttercream for chocolate frosting (you can add more powdered sugar to this recipe to make it more sturdy for piping).
- Themed birthday cookie cake – If your kiddo is set on an Elmo or unicorn cake, use frosting to decorate the border and buy a cake topper for the middle.
- Funny cookies cakes: Add a funny phrase or inside joke to make it personal to you!
Frequently Asked Questions:
What piping tips did you use?
I used a 849 Piping Tip for the border & a Wilton Round #5 for the numbers.
If you don’t have piping bags or metal tips for the frosting, you can put it in a zip-top bag and snip off the corner (it just won’t be as decorative). For the numbers, though, I do suggest using a piping tip (I used a #5 round tip) because the snipped-bag-corner alone is a little hard to cleanly decorate with.
Can you use store-bought cookie dough?
Wondering how to make a cookie cake with cookie dough from the store? After trying to use store-bought cookie dough to make a birthday cookie cake, I can definitely say that making a cookie cake from scratch works best. It yields a much sturdier cake and this recipe also makes the perfect amount of cookie dough for a giant cookie cake. But if you’re in a pinch, you could definitely use my decoration ideas on premade dough!
How do you store cookie cake?
This birthday cookie cake is best stored covered at room temperature for 2-3 days. If you use homemade frosting, I would refrigerate it if not eaten within a day (the sugar content in the frosting will help it not go bad as fast).
That said, I find that chilling cookie cakes will typically dry them out a bit so for the freshest flavor and texture, I wouldn’t make this more than a day or two ahead of when you plan to eat.
Can you make this into a layered cookie cake?
The only thing better than a birthday cookie cake is two birthday cookie cakes layered on top of each other, right?! So yes, you can totally do that (some people have uploaded pictures of their layered cakes on Pinterest!). For a double layer cookie cake, double the frosting recipe (so that you have some for the middle!) and bake the cookie dough in 9-inch round pans. Add a few minutes to the baking time for a sturdier cookie that stands up better to layering.
For more cookie cake designs for birthdays, scroll through over 70+ photos readers have uploaded on Pinterest of their cakes!
Is a cookie cake just a large chocolate chip cookie?
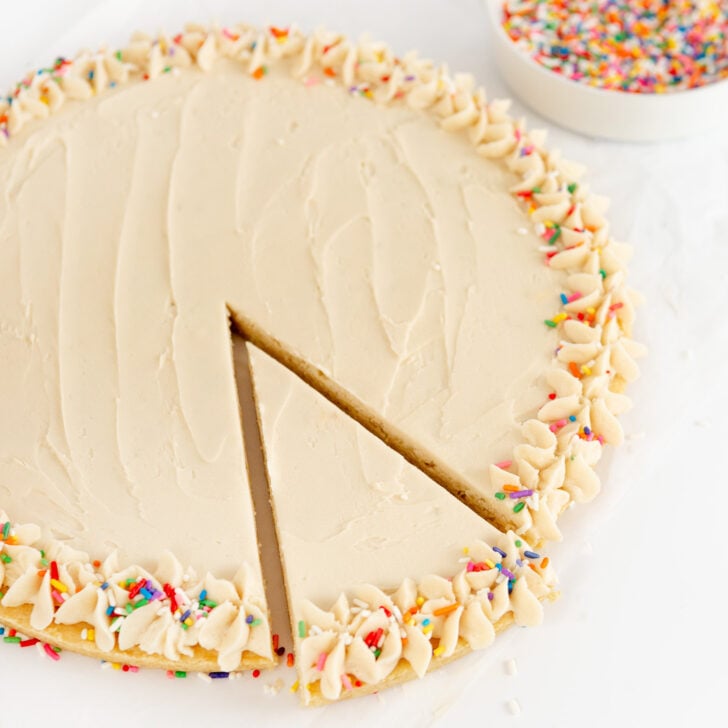
Pretty much! I do make some adjustments to the cookie dough here to make sure it has the perfect chewy, soft texture, but still holds up well to being cut into wedges. In other words, you can’t make a cookie cake out of just any cookie recipe! This easy chocolate chip cookie cake recipe was developed specifically for this purpose. I also have a sugar cookie cake and Chewy M&M Cookie Cake if you’d like to try one of those instead!
Giant Birthday Cookie Cake (+ free stencils!)
Who needs birthday cake when you can have a GIANT birthday cookie cake instead?! This cookie cake recipe is chewy, chocolaty, fabulously festive, and a breeze to make. Includes my free printable number template for easy decorating!
Ingredients
birthday cookie cake recipe
- 1/2 cup unsalted butter You will be melting this
- 1/2 cup brown sugar
- 1/4 cup granulated sugar
- 1 large egg
- 1.5 teaspoon vanilla extract
- 1/2 teaspoon baking soda
- 1/4 teaspoon baking powder
- 1/4 teaspoon salt
- 1.5 cups all-purpose flour
- 1 cup semi-sweet chocolate chips You’ll be chopping 1/2 cup and adding the remaining 1/2 cup whole.
vanilla buttercream frosting
- 1/2 cup unsalted butter softened to room temperature
- 2 1/2 cups powdered sugar
- 1 1/2 teaspoons vanilla extract
- Pinch of Salt
- 2-4 tablespoons milk
Before you begin! If you make this, will you do me a huge favor and leave a review and rating letting me know how you liked this recipe? This helps my small business thrive so I can continue providing free recipes and high-quality content for you.
Instructions
-
Preheat oven to 350 degrees.
-
Place 1/2 cup of the chocolate chips in a plastic bag and use a rolling pin to break them down into small pieces (set the other 1/2 cup of unchopped chocolate chips aside). The goal here is to have a mixture of tiny chocolate flakes throughout the dough, while still have the whole chunks in there for texture. Once chopped, set aside.
-
In a small microwave-safe bowl, melt the butter for 20-30 seconds until JUST melted.
-
Add in white sugar and brown sugar and use a spatula to stir until combined (* do not use a mixer!). Add in egg and vanilla, then mix. Next, add in baking soda, baking powder, and salt and mix again. Add in flour and mix until all the flour disappears into the dough.
-
Add the 1/2 cup of chopped chocolate chips and 1/2 cup of whole chocoalte chips into the dough and mix. Immediately proceed to pressing into pan (you don’t want the dough sitting out or it will set too much with the melted butter).
-
Grease a 10.5″ metal cookie cake pan (don’t have one? See notes below.) Although this cookie removes cleanly, if you are worried about it sticking, line the bottom and sides of the pan with parchment paper first. Using a spoon or your clean hands, drop the dough into small chunks in the pan. This will help disperse everything so that you can easily smooth it out. Once all dough as been added, use a spatula or your hands to press down the dough into a smooth layer (being sure to get all the corners).
-
Tip: If you notice 2-3 chocolate chips are stuck together, separate them before baking. This will allow the chocolate to be evenly dispersed and prevent the cookie from having a giant clump of chocolate in one spot (which could cause it to more easily break while cutting).
-
Bake at 350 degrees for 12-14 minutes – do NOT overbake or your chocolate chip cookie cake will not be soft. You want the cookie cake to be slightly brown on the top and look slightly underbaked (my oven was perfect at 12 minutes). Remove from oven and place entire pan on a cooling rack. Allow the cookie cake to cool completely before removing from pan or decorating.
-
To remove from pan, use a knife to go around the edges, place a flat platter on top, then flip over the pan to remove. If you used parchment paper, this should come out rather smoothly. After flipping over the cookie cake, flip it over again on the final decorate plate or platter.
to make frosting:
-
Beat the softened butter on medium-high speed for 2-minutes until smooth. Turn the mixer to low speed then add the powdered sugar 1/4 cup at a time. You may need to stop and scrape down sides. Add vanilla and salt and turn mixer to medium speed. One tablespoon at a time, add milk. Beat on high for 2-3 minutes until creamy and the frosting is at a good consistency to pipe. If it looks too runny, add more powdered sugar. If it looks too stiff, add a tiny bit of milk until you get to the desired consistency.
-
Using a large star piping tip*, pipe around the edges then immediately add sprinkles (the frosting will start hardening quick, so add sprinkles right away!). This frosting makes enough to pipe a border & number(s) on top. If you only plan to pipe a border (and nothing in the center), cut the frosting recipe in half.
Print off my free number template to use as a stencil (see photos in post above for instructions).
Last Step! Please leave a review and rating letting me know how you liked this recipe! This helps my small business thrive so I can continue providing free recipes and high-quality content for you.
Recipe Notes
What size cookie cake pan do you have? The Wilton website technically calls it a 10.5″ Cookie Cake pan since that’s the bottom diameter but the top rim measures 12″. So it is often referred to as a 10″ or 12″ pan.
Piping Tips: I used a 849 Piping Tip for the border & a Wilton Round #5 for the numbers.
Don’t have a round 10.5″ pan? You can bake in a 9×13 pan (they’ll be a little thinner) OR Create a DIY cookie cake pan using a large mixing bowl (that is about 10.5″ in diameter) with aluminum foil (see instructions in my original post on how to make it). Because you don’t have as much heat from a real metal pan, these typically take an extra 4-6 minutes to bake.
Frosting Tip: This homemade buttercream will start developing a crust, which makes it a great frosting to make a day ahead. Because of the sugar content, you don’t need to refrigerate the frosted cookie cake if you plan to enjoy it within 1 day. If you are making ahead earlier, I’d suggest waiting to frost until day of OR gently wrap the frosted cookie after the frosting sets and place in the fridge.
Freezing/Make Ahead Tip: I don’t typically like freezing chocolate chip cookies because I feel like they get dry and not as chewy in the freezer. If you do need to make this in advance, you could wrap the baked, unfrosted cookie in plastic wrap and when you’re ready to eat it, let it thaw to room temperature then frost.
Can I double this recipe? You can, but you still want to make sure the dough is only 1/2″ thick once spread in the pan (so you would need a larger pan than 10″). Note that thicker dough will require longer baking times and won’t be as much like the traditional, chewy cookie cake recipe you may be used to. If you want a thicker cake, I’d instead make 2 cakes and then layer them on top of each other. Or for a thicker 9×13 version, use my Chocolate Chip Cookie Bar recipe.
Nutrition information is just an estimate but based on 12 servings.
Nutrition
If you make these (keyword), be sure to leave a comment below and tag me on Instagram @designeatrepeat. I LOVE seeing what you made!


Naomi says
The cookie is soft and perfect!
Melissa says
Yay, I’m so happy the cookie cake turned out great for you! Thank you for taking the time to leave a review, Naomi!
Jyssica says
This is the best recipe. I made it for my brothers birthday last week. He accused me of buying the cake and passing it off as homemade. Then I made it again for a baby shower at work and I had at least 4 people come up to me and say that it was the best cookie cake they’ve ever had. I made a double layered one this weekend for my sister in law and then baking one tonight before my daughters birthday. It has now become my go-to recipe in a matter of 10 days!
Melissa says
Wow! That is such a wonderful compliment Jyssica! Thank you for taking the time to come back and leave your review telling these stories! I so appreciate it and am so glad that you and your family and friends have loved this recipe.